Two kinds of admin: SuperAdmin is the platform operator (deployment level) — only SuperAdmin can create companies and shape the organization tree, and it is never assignable from the Users screen. Admin is a normal company administrator who manages users, roles, branches, and module seats inside their companies.
Beta note — subscriptions are manual. There is no payment gateway and no self-service checkout yet. The platform owner provisions each company by hand: create the company, activate its modules and set a per-module seat cap, then either the owner or the company Admin assigns per-user seats. Payment is out-of-band. See Subscriptions & module seats.
Setup order at a glance
- Create companies under your organization and place them in the org tree (SuperAdmin).
- Create branches for each company's physical locations (Admin).
- Create users and assign their roles and access (Admin).
- Activate modules and assign seats so people can use paid features (Admin).
1. Create companies under the organization
Who: SuperAdmin (platform operator) only. Where: the /admin/companies screen, then Settings → Organization to arrange the tree.
Why: every record lives under a company. A company can have a parent, so a group/holding company sits above its subsidiaries — that is your organization tree.
Create a company
- Go to
/admin/companies. - Click "Add company" (top-right) to open the form.
- Fill in Name (required), Tax number, Phone, Email, Address, Currency (3-letter code, defaults to
USD), and Timezone (defaults toUTC). - Click "Add company" to save — it appears in the list below.
- Use the row's "Deactivate" / "Activate" button to turn a company on or off later.
Place the company in the org tree
- Go to Settings → Organization — the tree shows the root company with descendants indented underneath.
- Use a row's Parent dropdown to pick the company that sits above it. The move saves immediately.
- Choose "No parent" to make a company top-level (a root).
Common mistakes: you cannot re-parent a company under one of its own descendants (loop) or beyond the maximum tree depth — both are rejected with an error. The Parent dropdown only shows for SuperAdmins.
2. Create branches
Who: company Admin. Where: Settings → Branches.
Why: branches are the physical locations/offices inside a company. They scope sales, purchases, and inventory to a location, and you can restrict a user to specific branches (see section 3).
Add a branch
- Go to Settings → Branches — a form sits on the left, the branch list on the right.
- Fill in Name (required), Code (required, e.g.
HQ/WH1), Address, City, Country, Phone, and tick Head office if this is the head office. - Click "Create". The branch shows up with its code, an Active badge, and a Head office badge where applicable.
Use "Edit" on a card to load it back into the form (then "Update"), or "Deactivate" to retire it (with a confirmation).
Tip: Name and Code are the only required fields — the "Create" button stays disabled until both are filled. Keep codes short and unique; they appear next to the branch name everywhere.
3. Create users and assign roles
Who: company Admin. Where: Settings → Users (people and access) and Settings → Roles (what each role can do).
Why: users sign in and do the work; roles decide what they can see and do. Roles are per-company — each company has its own role set.
The seeded roles
| Role | What it can do |
|---|---|
| Admin | Full ERP access. |
| User | Read-only (view + export). |
Both are system roles — viewable but not deletable, and their permissions can't be edited. Create your own role for anything in between.
SuperAdmin is not in this list. It is a platform-operator grant and is not assignable from the Users screen — the system refuses to attach it through the UI.
Create a user
- Go to Settings → Users and click "New user".
- Enter Email and Username (required), plus first/last name (optional).
- Tick the role chip(s) — e.g. Admin or User.
- Pick a Password mode: Invite (default — issues an invite token), Auto (generates a password, shown once), or Manual (you type it). For Auto/Manual you can tick "Must change password".
- Click "Create invite" or "Create". Any token/password appears in a highlighted box — click "Copy"; it's shown only once.
Roles, access, and effective access
- Change roles: click the ✎ pencil in the Roles column, tick/untick chips, click ✓ to save.
- "Access": expands company memberships — extend access down the tree with "Include descendants" (and an inherited role), and use the branch picker (no branches ticked = all branches; tick some to restrict).
- "Effective access": a read-only summary per company — how access was gained, roles, permission count, branch limits, and module seats. Use it to answer "why can/can't this person see X?"
Custom roles (Settings → Roles)
- Click "New role", give it a Name and optional Description.
- Tick actions in the permission matrix per module/resource; use "Toggle all" on a group header to flip a whole module.
- Click "Save" — it becomes assignable on the Users screen.
Common mistakes: system roles (Admin, User) open in view-only mode — make a custom role instead. You can't delete a role that still has users. Roles in Company A don't exist in Company B.
4. Assign module seats
Who: organization Admin. Where: Settings → Module Access.
Why: this controls which paid/marketplace modules each user can actually use. Installed ≠ usable — a module must be activated for the organization, then each user needs a seat.
The model in plain terms
- Installed — the module exists in your deployment (operator installs it from the marketplace).
- Activated — you switch it On for your organization.
- Seated — you tick the specific users allowed to use it.
A user only sees and uses a module when it is activated and they hold a seat.
Activate a module and assign seats
- Go to Settings → Module Access — a table lists each installed (non-core) module with an Activated toggle and a Seats count.
- Click the Off toggle so it flips to On (green) for the modules you want active.
- Click "Manage seats" to expand the user list.
- Tick the checkbox next to each user who should get access — each tick assigns a seat instantly; unticking removes it.
- Watch the Seats column — it reads
usedon its own when the module is uncapped, orused / capwhen a seat cap is set. When the cap is reached, the next assignment is refused with a "cap reached" message.
Tips & common mistakes: "Manage seats" appears only after a module is On — activate first. Only active users appear in the seat list. Changing your own seat updates your sidebar live. Out of seats means you hit the seat cap — that ceiling is set by the platform operator (see Subscriptions & module seats); the Module Access screen lets you seat users up to it, not change it.
Subscriptions & module seats (manual provisioning)
No automated checkout yet. For the beta there is no payment gateway and no self-service plan picker. Subscriptions are provisioned manually by the platform owner, and billing is handled out-of-band (invoice, transfer, or whatever you agree with the customer). Nothing in the product charges a card.
Why this matters: a module being installed on the deployment does not mean a company can use it. Access is built up in layers — install → activate → seat — so the same deployment can serve many companies, each entitled to a different set of modules and a different number of seats.
The layered model (Stage 29 entitlement)
- Installed — the signed module exists on the deployment. The platform owner (SuperAdmin) installs/enables it from the Marketplace; it then loads platform-wide.
- Entitled & activated — the module is switched On for a specific company (org) on Settings → Module Access. Until it is activated, no one in that company can use it.
- Seat cap — each activated module carries a per-module seat cap (the ceiling on how many users may hold a seat). The cap is set by the platform owner as part of provisioning;
unlimitedis allowed. The cap is what you agree commercially for that company. - Seated — individual users are given a seat for the module. A user only sees and uses a module when it is activated and they hold a seat, up to the cap.
Who does what
| Step | Who | Where |
|---|---|---|
| Create the company | Platform owner (SuperAdmin) | /admin/companies |
| Install / enable the module | Platform owner (SuperAdmin) | Marketplace |
| Activate the module for the company & set its seat cap | Platform owner | Settings → Module Access (cap set during provisioning) |
| Assign per-user seats (up to the cap) | Platform owner or company Admin | Settings → Module Access → "Manage seats" |
| Pay | Customer | Out-of-band — no in-app payment |
Beta provisioning flow, end to end
- The owner creates the company under the organization (section 1) and agrees the modules and seat counts with the customer out-of-band.
- The owner makes sure each agreed module is installed/enabled from the Marketplace, then opens Settings → Module Access for that company and activates each one.
- The owner sets the per-module seat cap to the agreed number (or leaves it unlimited).
- Either the owner or the company Admin then assigns seats to users via "Manage seats", up to the cap. Assignments above the cap are refused until the cap is raised.
- The customer pays out-of-band. To change what they get later (more seats, another module), repeat: the owner raises the cap or activates the new module, then seats are assigned.
Seat cap vs. seat assignment: the cap (the ceiling) is part of manual provisioning and is set by the platform owner — the Module Access screen does not expose a field to change it. Assigning seats within that cap is day-to-day work the company Admin can do themselves. Lowering a cap below the seats already in use keeps the existing seats; it only blocks new assignments.
Quick recap
| # | Task | Menu path | Who |
|---|---|---|---|
| 1 | Create company & set parent | /admin/companies, then Settings → Organization | SuperAdmin |
| 2 | Create branch | Settings → Branches | Admin |
| 3 | Create user & roles | Settings → Users / Settings → Roles | Admin |
| 4 | Activate module & assign seats | Settings → Module Access | Admin (cap set by owner) |
| 5 | Provision the subscription (manual) | Marketplace + Settings → Module Access; payment out-of-band | Owner |
Screenshots
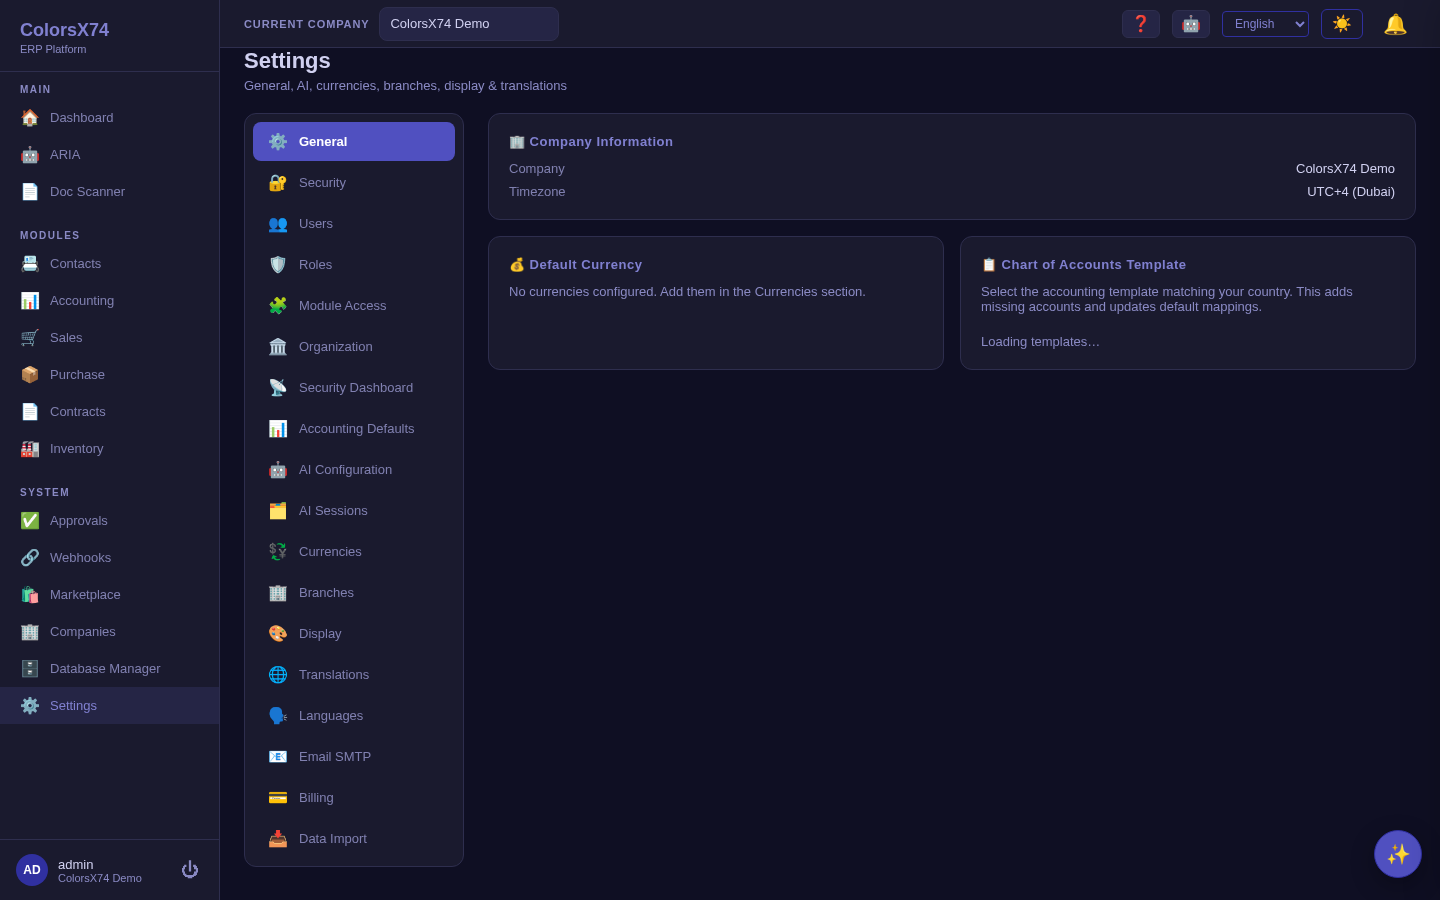
Every screen in this guide lives under Settings — Organization, Branches, Users, Roles, and Module Access are entries in the same settings area.
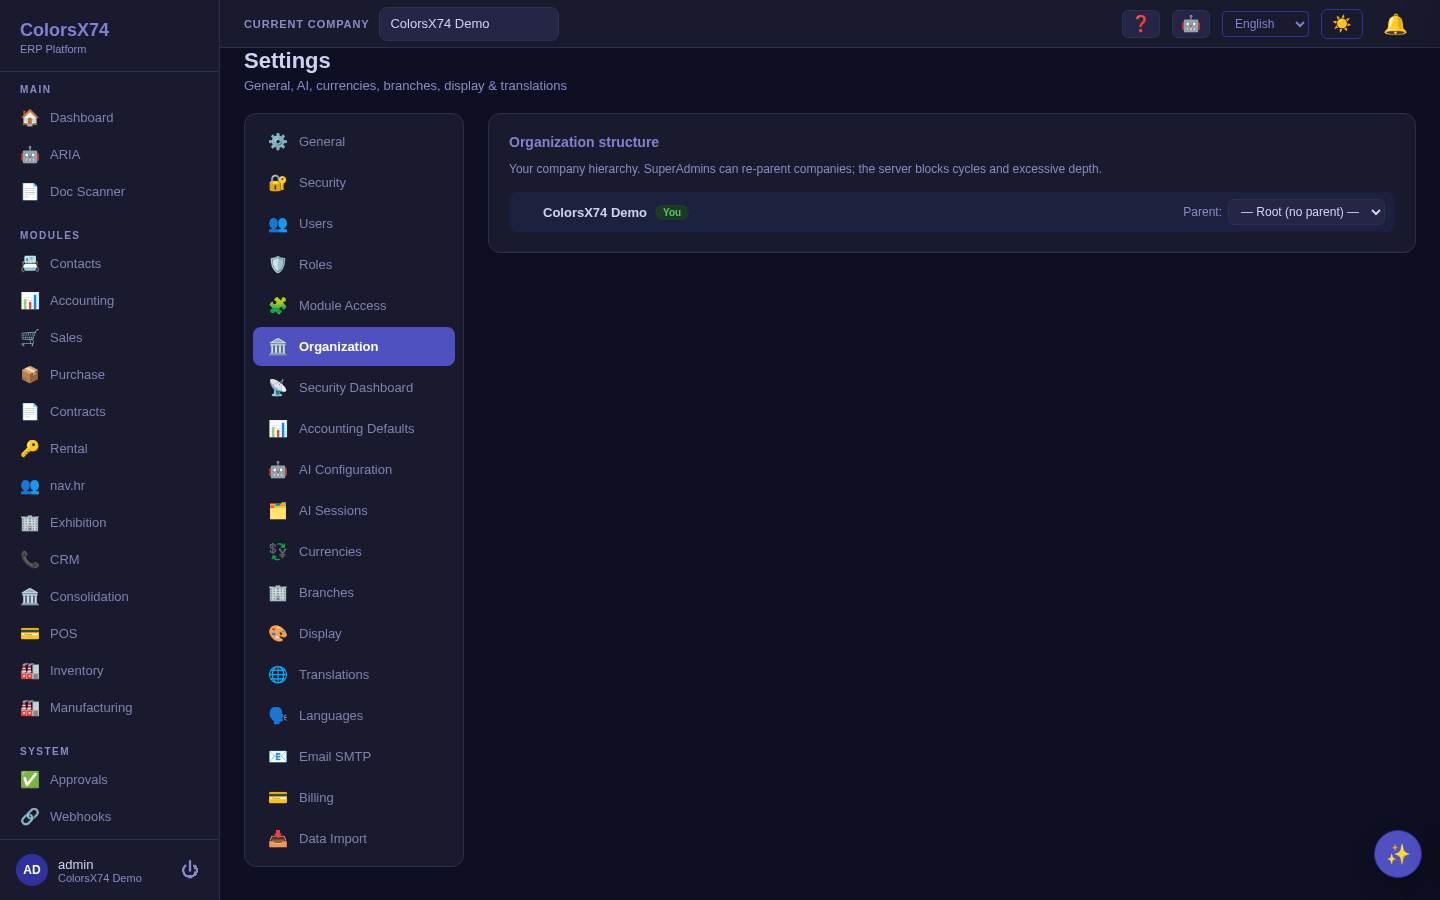
Place a company under its parent in the org tree.
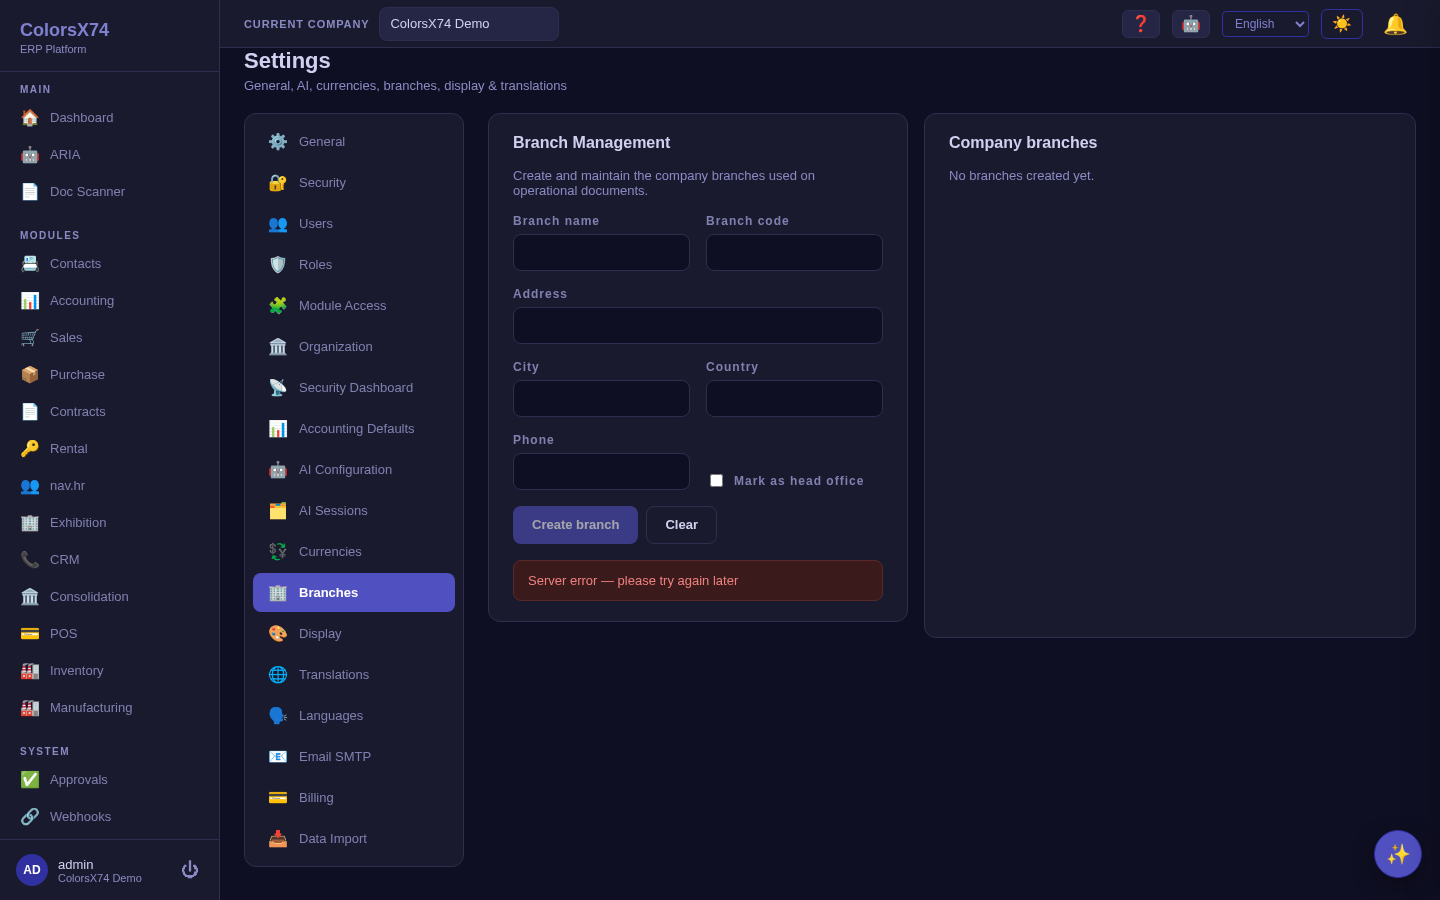
Add branches (code, name, head-office) used for branch-level scoping.
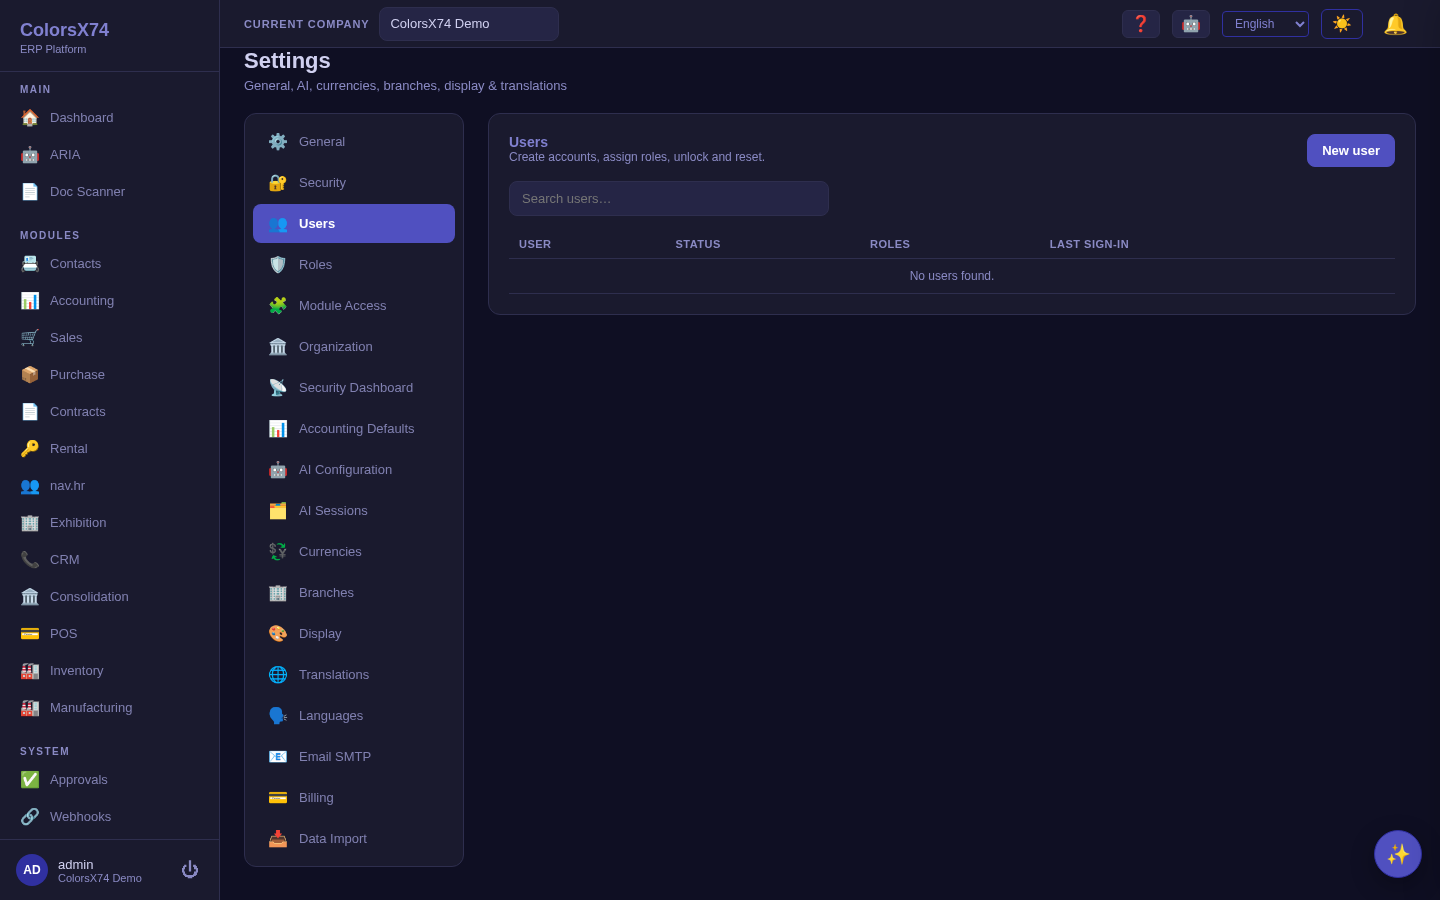
Create users and assign their role(s) per company.
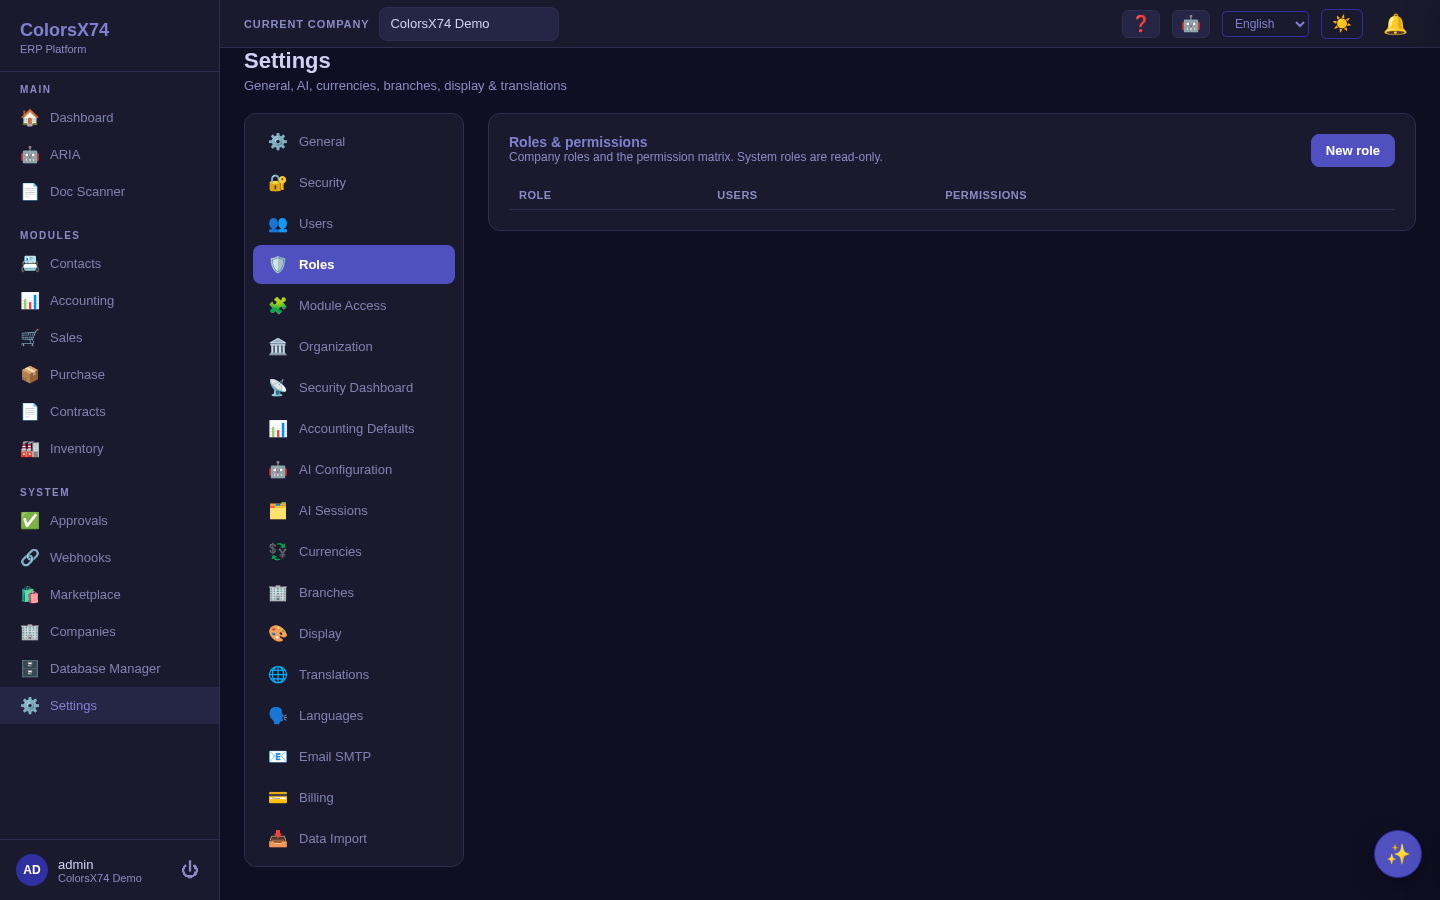
The permission matrix behind each role.
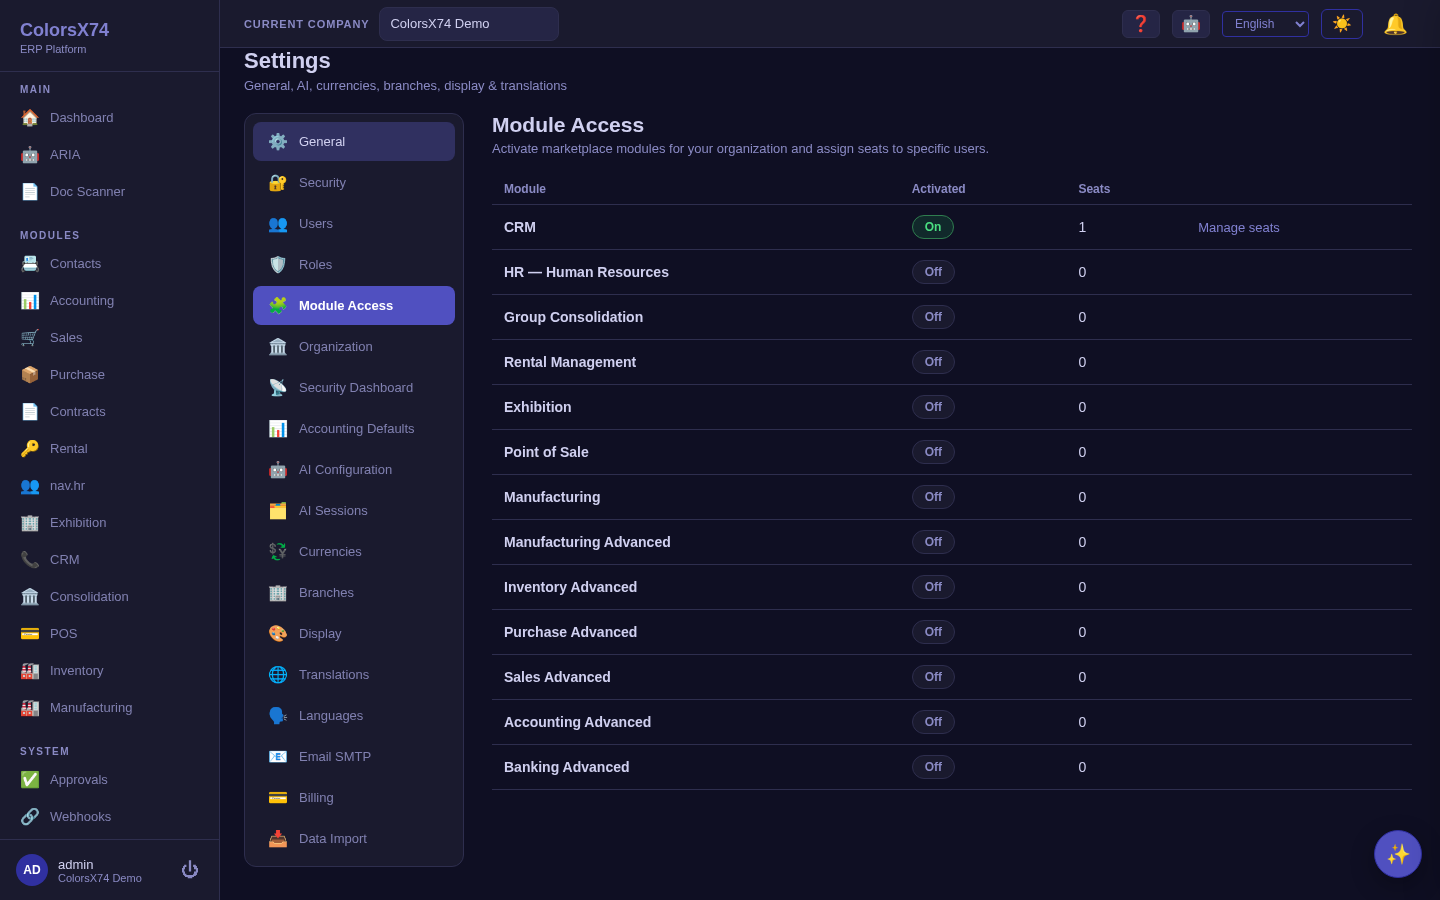
Activate a module for the org, then assign per-user seats.